Signing in to ClassSeats
ClassSeats uses email sign-in instead of passwords. When you sign in, ClassSeats sends a secure 6-digit code to your email. After that, you can connect Google Drive for desktop and mobile access, or keep working locally and connect Drive later.
Sign in with email
Start your trial or continue with limited access
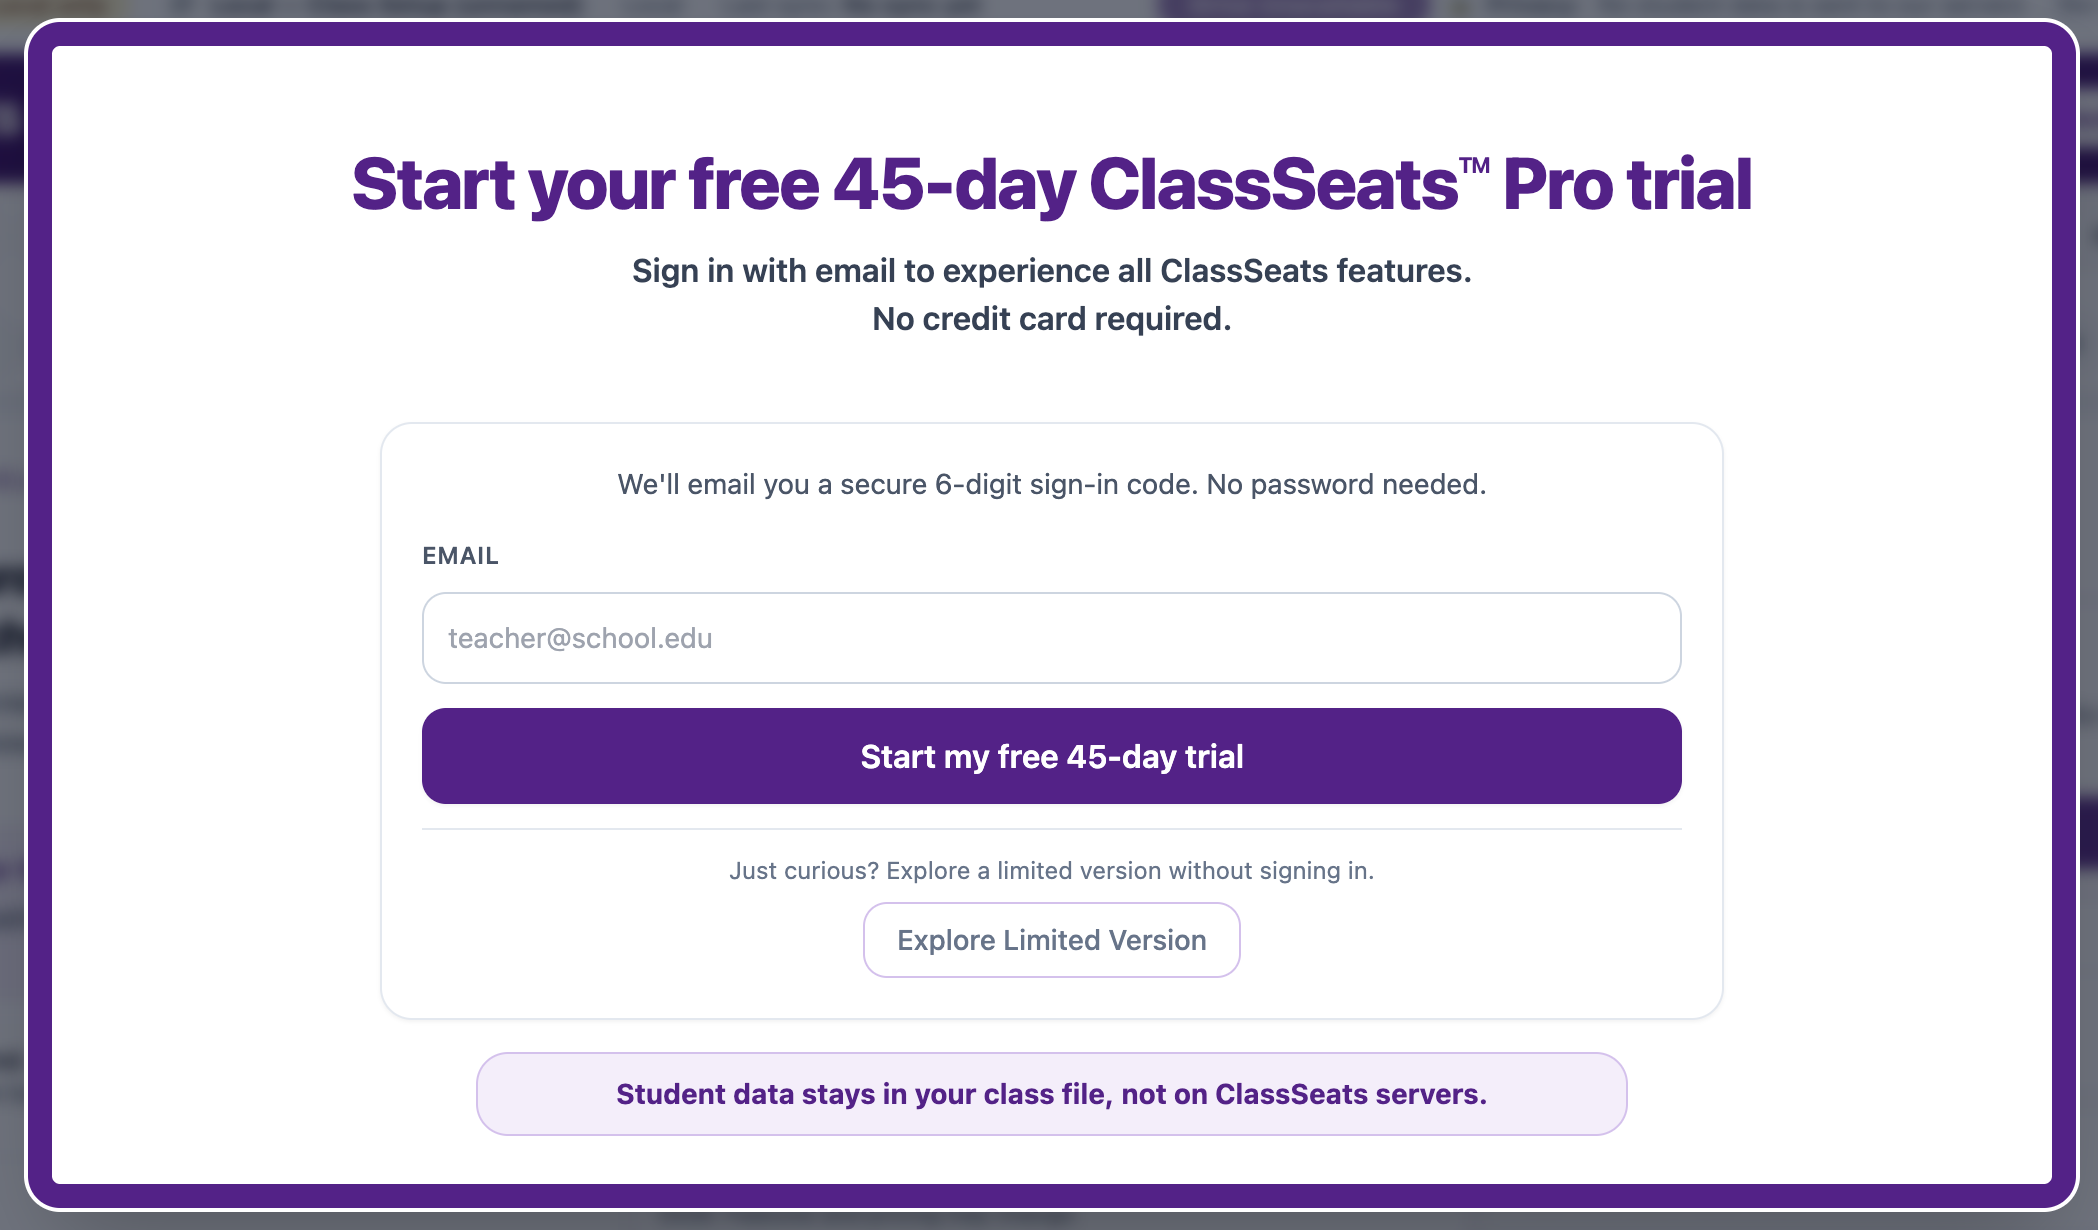
When you open ClassSeats for the first time, you’ll see the sign-in screen.
To start your free 45-day ClassSeats Pro trial, enter your email address and click Start my free 45-day trial.
If you only want to explore first, click Explore Limited Version. The limited version lets you try ClassSeats without signing in. You can keep your data on your device only, but you should use the menu’s Save Local option to make backup copies of your ClassSeats file.
Enter your sign-in code
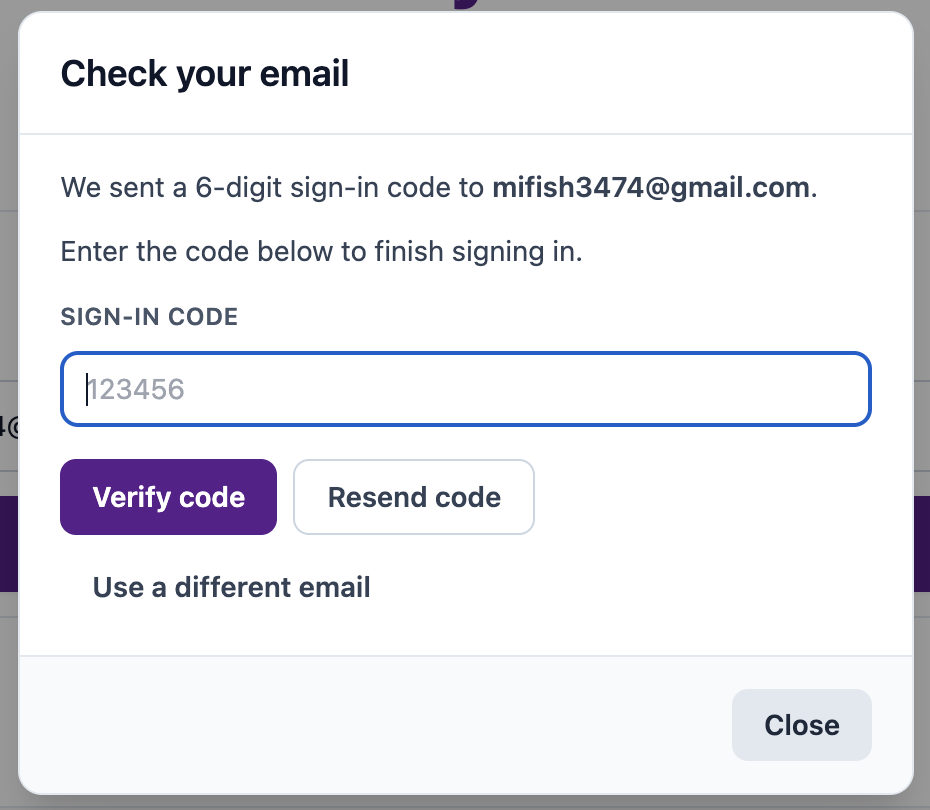
After you submit your email, check your inbox for a 6-digit sign-in code.
Enter the code in the Sign-in code field, then click Verify code.
If you do not receive the email, click Resend code. If you used the wrong email address, click Use a different email.
Choose how your file is saved
Choose whether to connect Google Drive
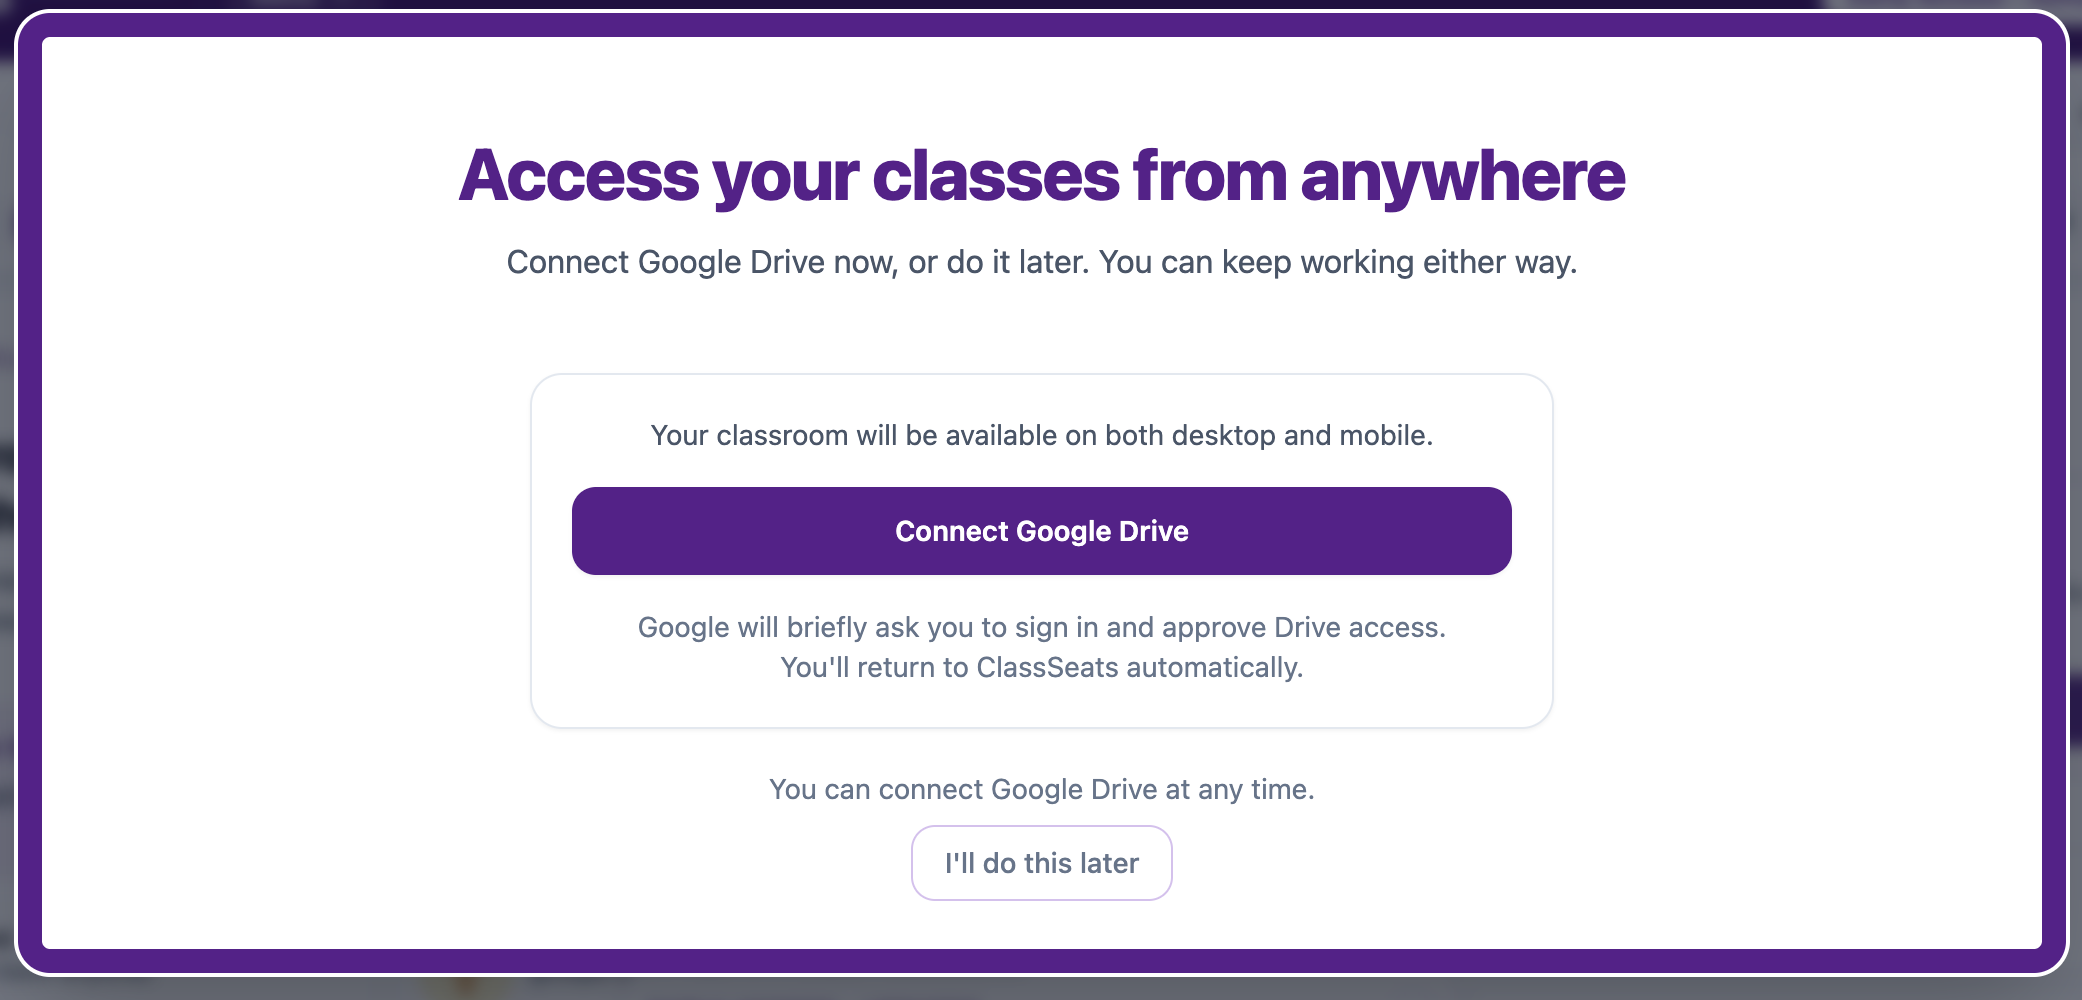
After signing in, ClassSeats asks whether you want to connect Google Drive.
Connecting Google Drive lets you use your ClassSeats file on both desktop and mobile. Google will briefly ask you to sign in and approve Drive access, then you’ll return to ClassSeats automatically.
If you do not want to connect Drive right now, click I’ll do this later. You can keep working locally and connect Google Drive later.
Sign in with Google
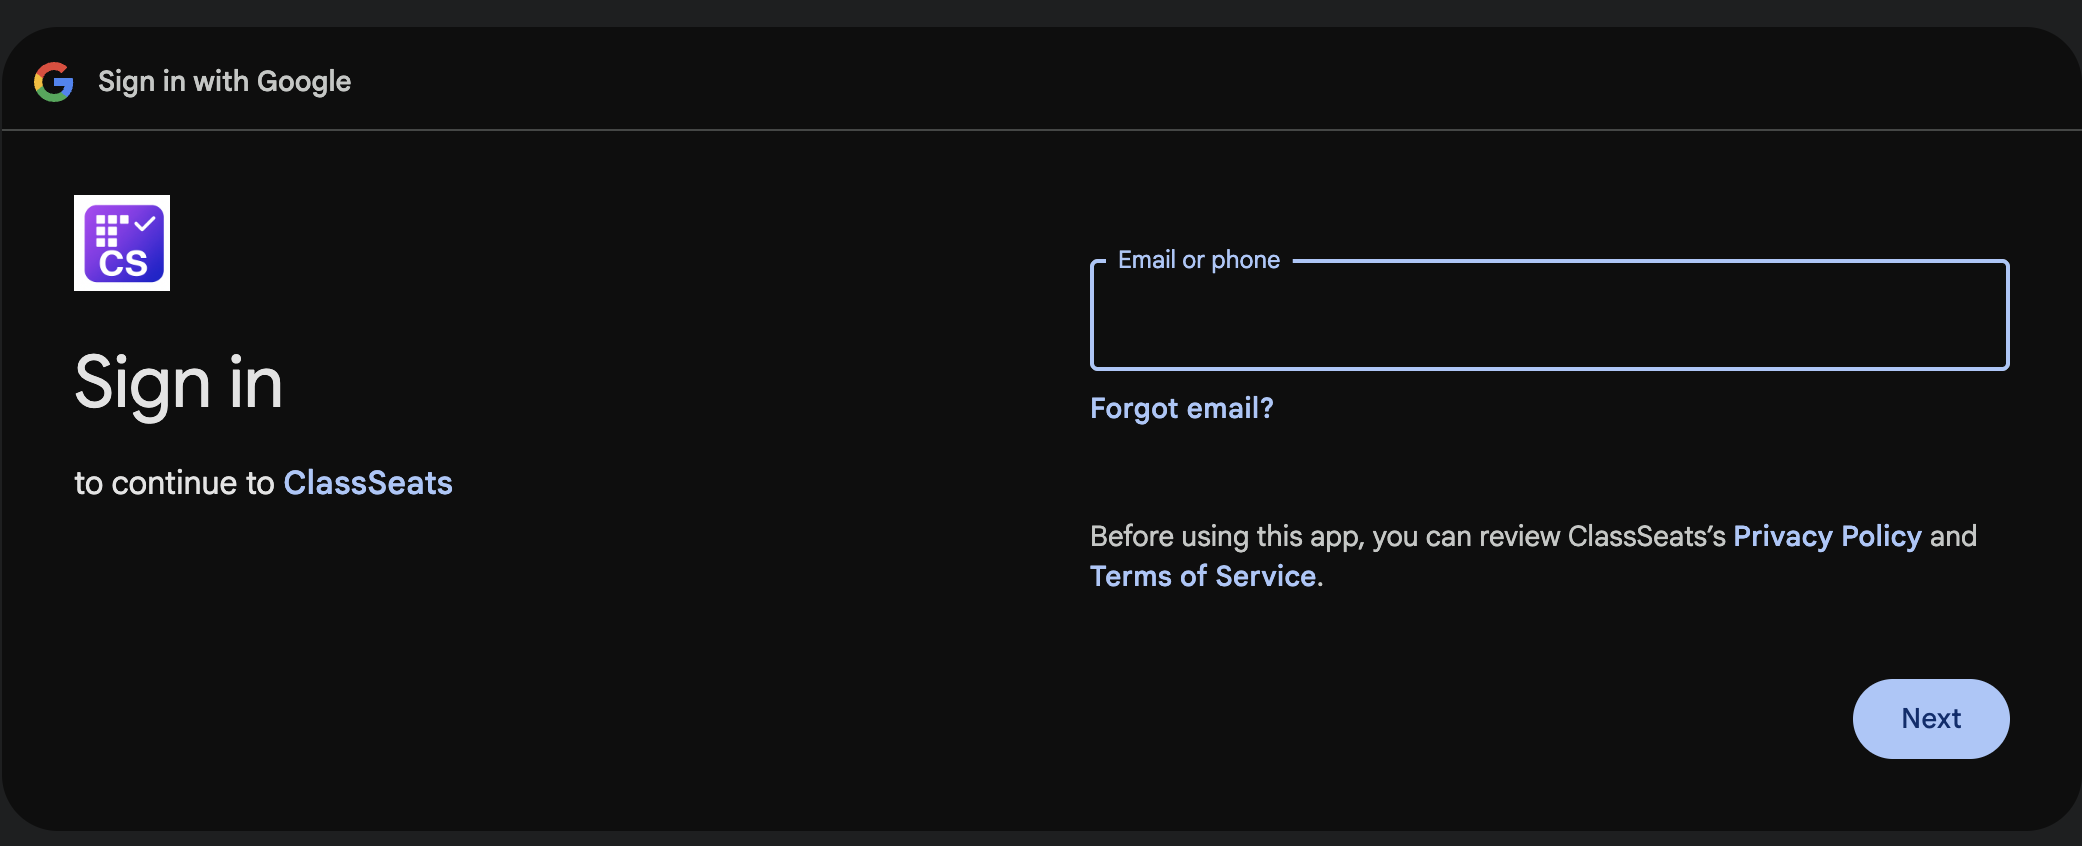
If you choose to connect Google Drive, Google opens a sign-in page.
Enter the Google account you want to use with ClassSeats, then click Next. This should be the account where you want your ClassSeats classroom files saved.
Confirm your Google Drive account
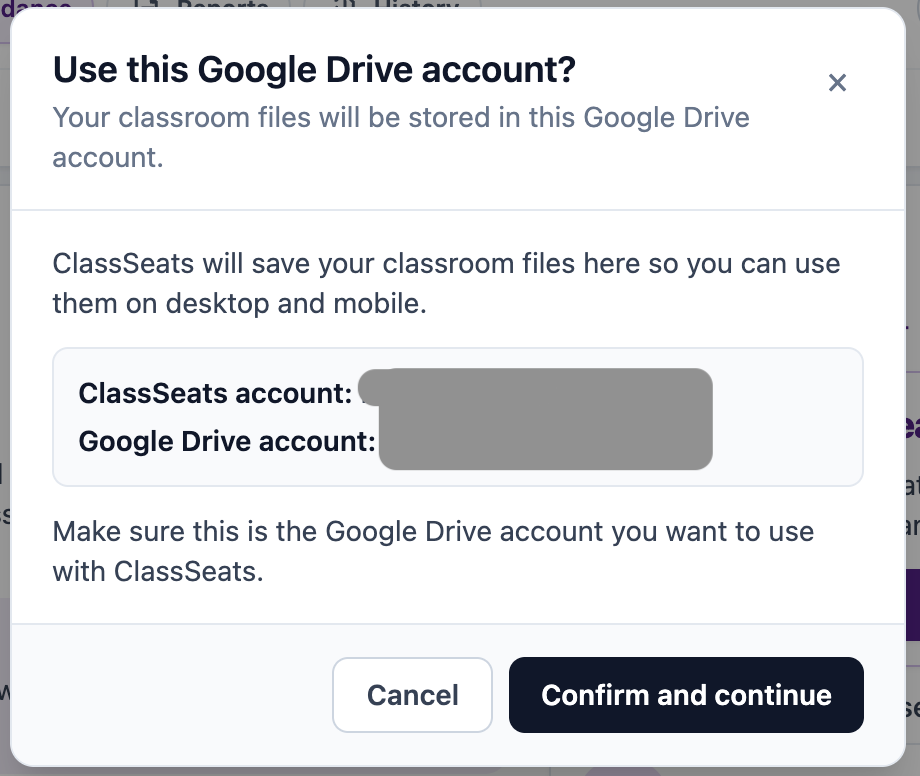
When you return to ClassSeats, confirm that the ClassSeats account and Google Drive account are correct.
ClassSeats will save your classroom files to your Google Drive account so you can use them on desktop and mobile.
Click Confirm and continue if the account is correct. Click Cancel if you need to use a different Google Drive account.
Create or back up your ClassSeats file
Create your first ClassSeats file
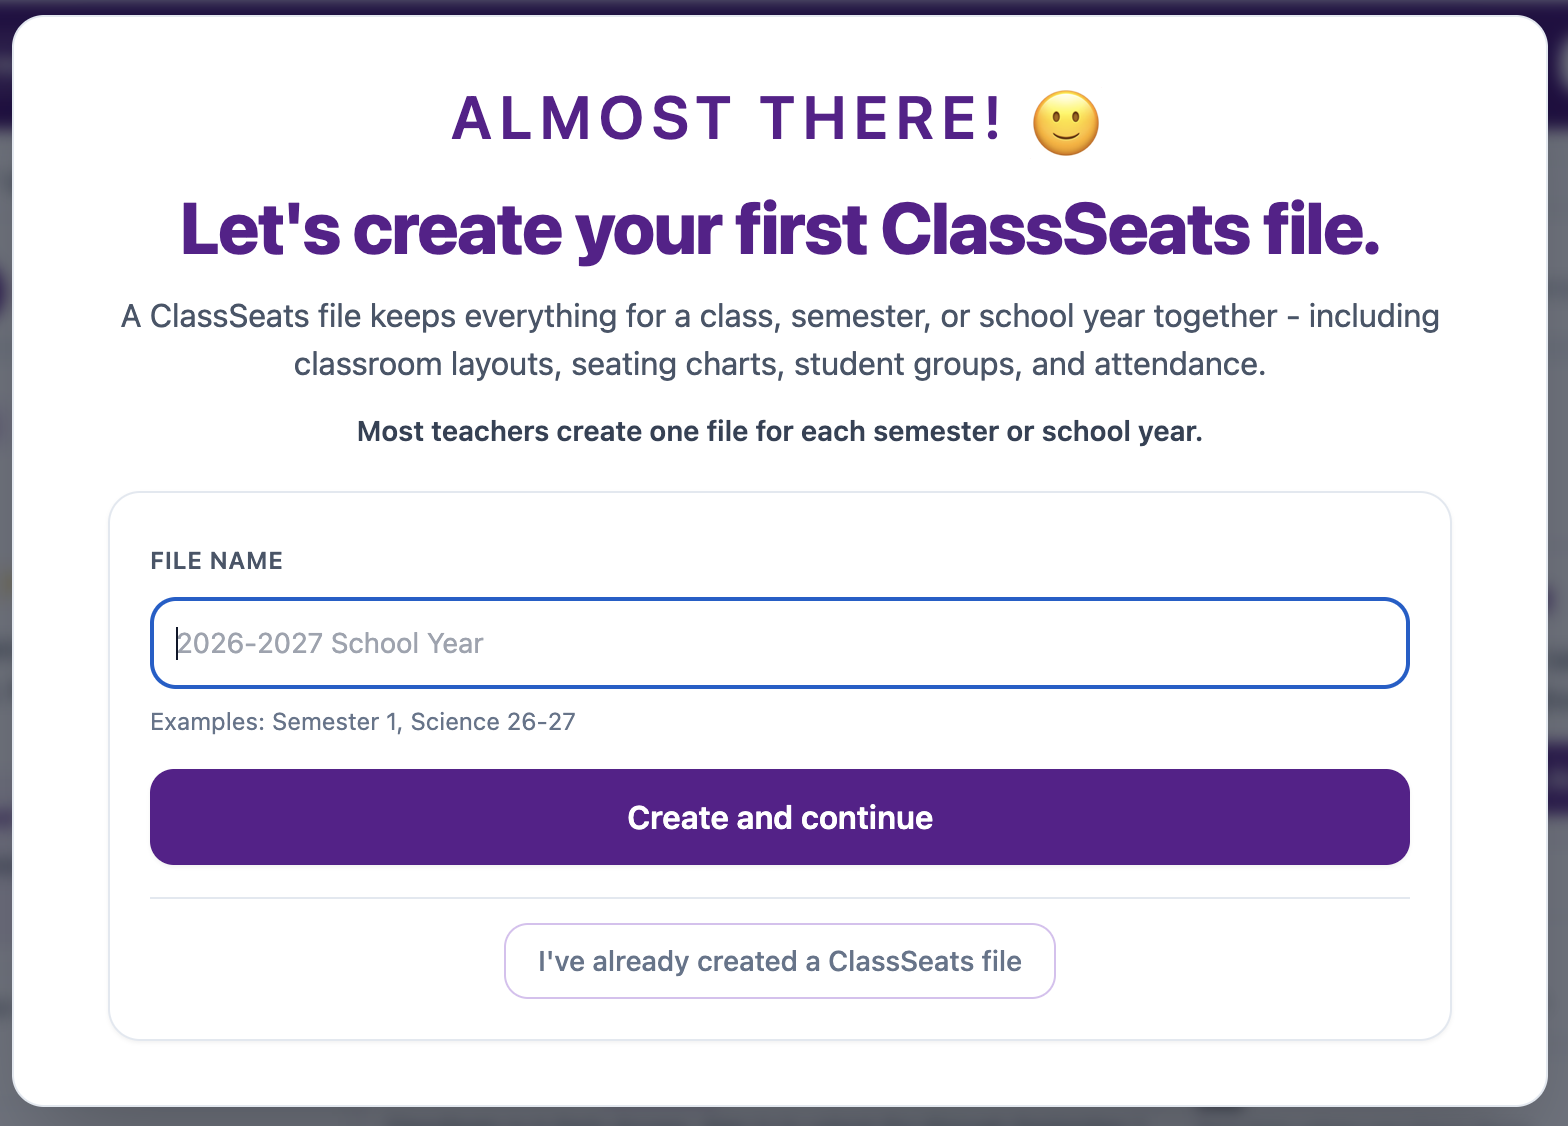
Next, ClassSeats asks you to create your first ClassSeats file.
A ClassSeats file keeps everything for a class, semester, or school year together, including classroom layouts, seating charts, student groups, and attendance. Most teachers create one file for each semester or school year.
Enter a file name, then click Create and continue.
Use a name you’ll recognize later, such as 2026-2027 School Year, Semester 1, or Science 26-27.
If you already created a ClassSeats file, click I’ve already created a ClassSeats file instead.
If you work locally, save backups
If you use ClassSeats without Google Drive, your ClassSeats file stays on that device. That can be useful when you are just exploring or when you do not want to connect Drive yet.
Because your data is not automatically synced to Google Drive when you work locally, you should regularly save backup copies of your ClassSeats file.
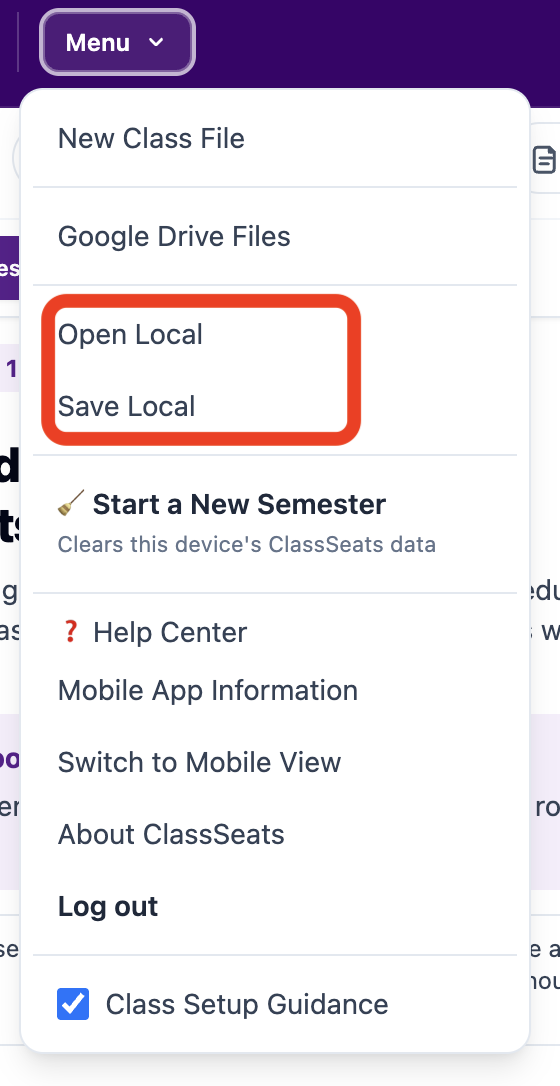
Open the Menu, then use:
- Save Local to download a backup copy of your current ClassSeats file.
- Open Local to load a previously saved local file.