Creating and assigning student tags individually
Student tags help you mark important information about students, such as accommodations, special needs, medical alerts, or interests. You can create your own tags, then assign them to individual students from the Students tab.
Step 1: Open Student Tags
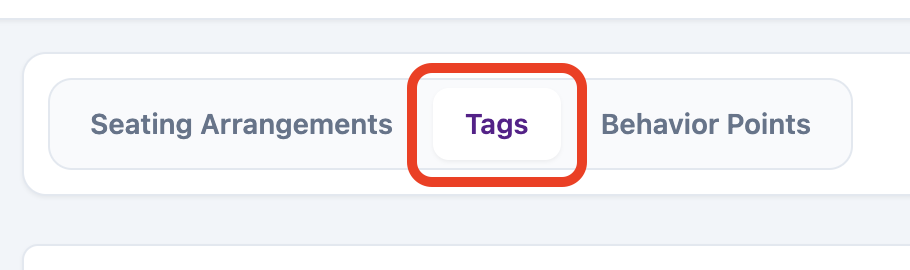
Go to the Room tab, then choose Tags.
This is where you create the tags you want to use in ClassSeats. Tags are custom, so you can make them match the kinds of information you want to remember.

In Room, use the tab row to open Tags.
Step 2: Create a tag
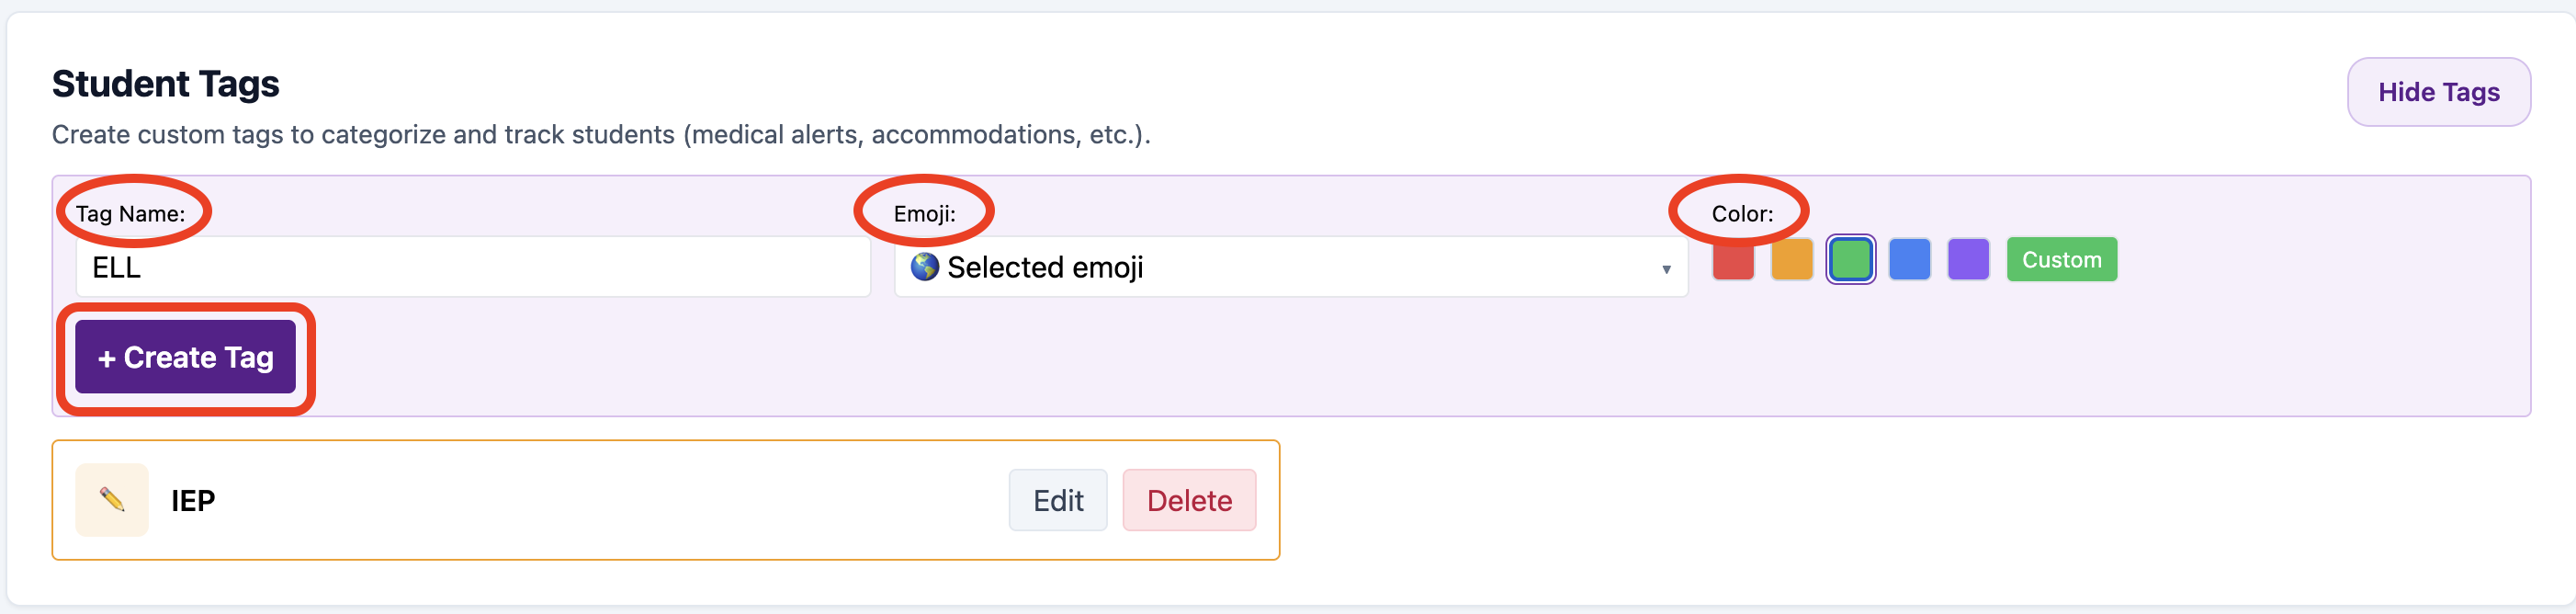
In the Student Tags section, enter a Tag Name. You can also choose an emoji and color to make the tag easier to recognize at a glance.
When the tag looks right, click + Create Tag.
Step 3: Review your tag list
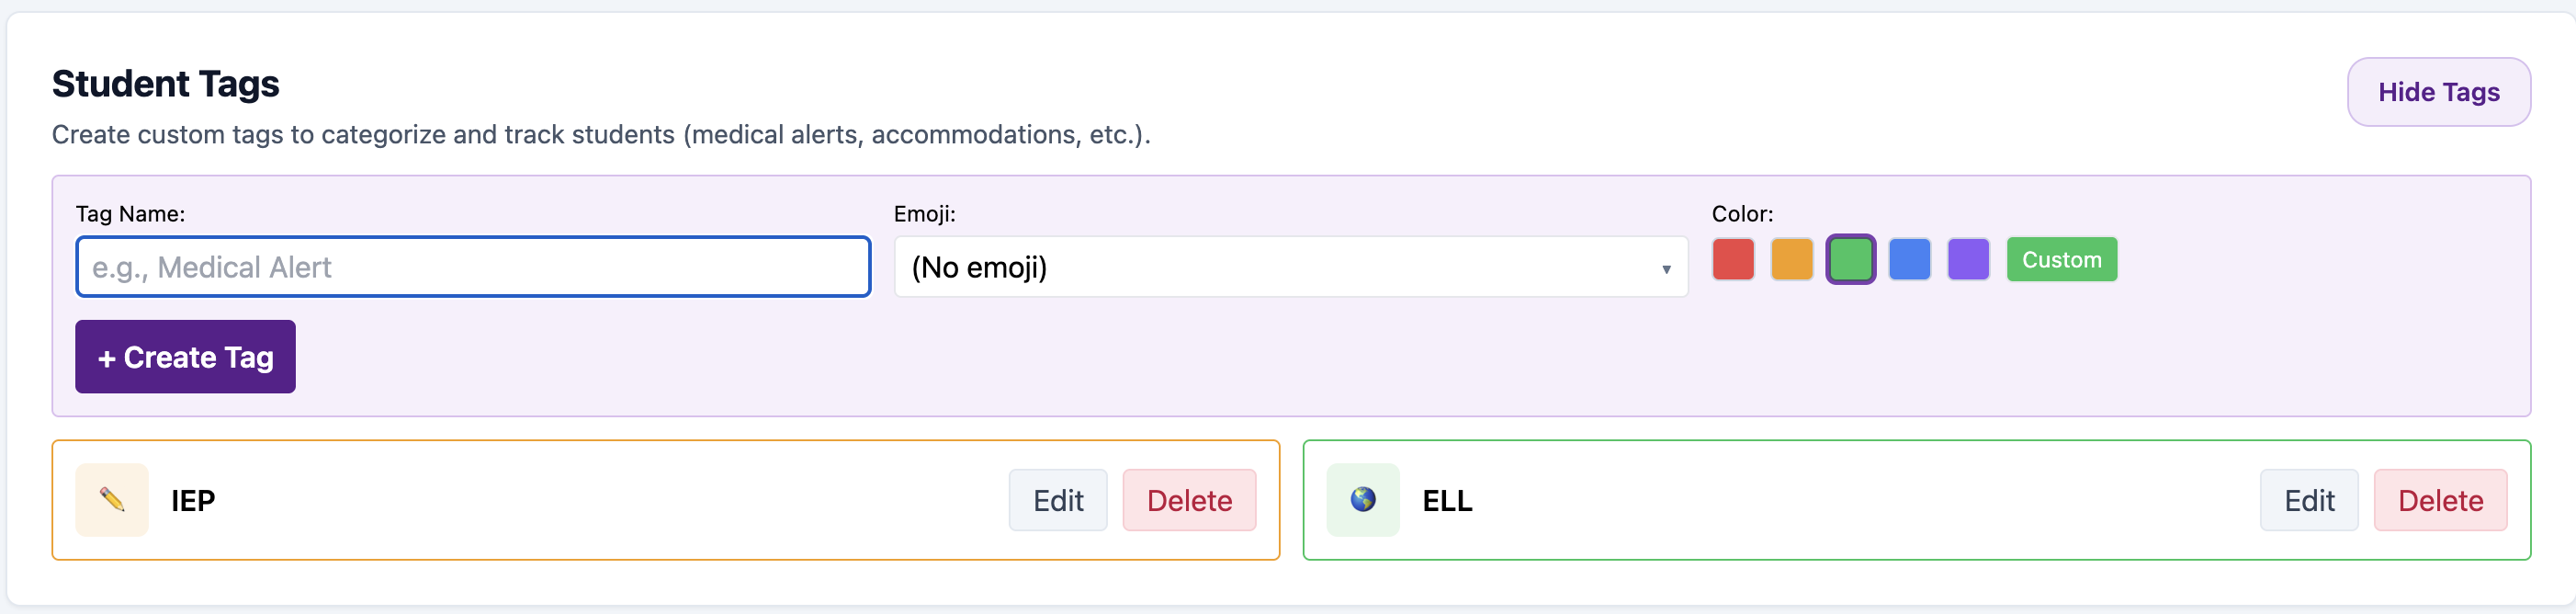
After you create a tag, it appears in your tag list. From here, you can create more tags, edit an existing tag, or delete a tag you no longer need.
Step 4: Assign a tag to a student
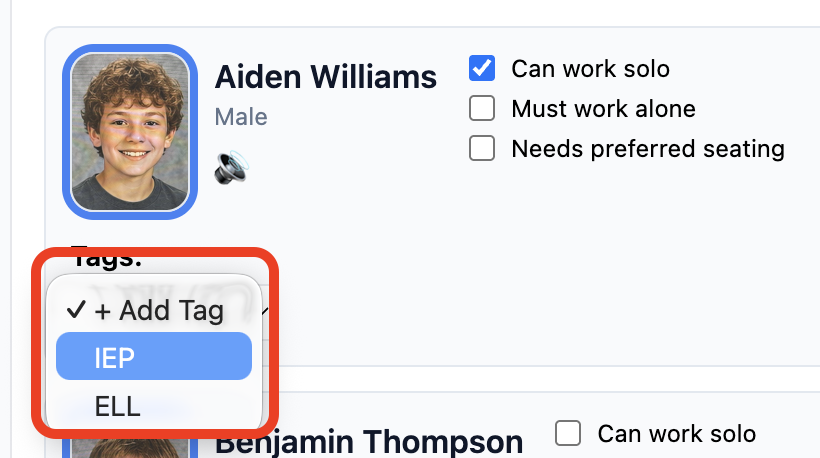
Go to the Students tab. On each student card, find the Tags area and click + Add Tag.
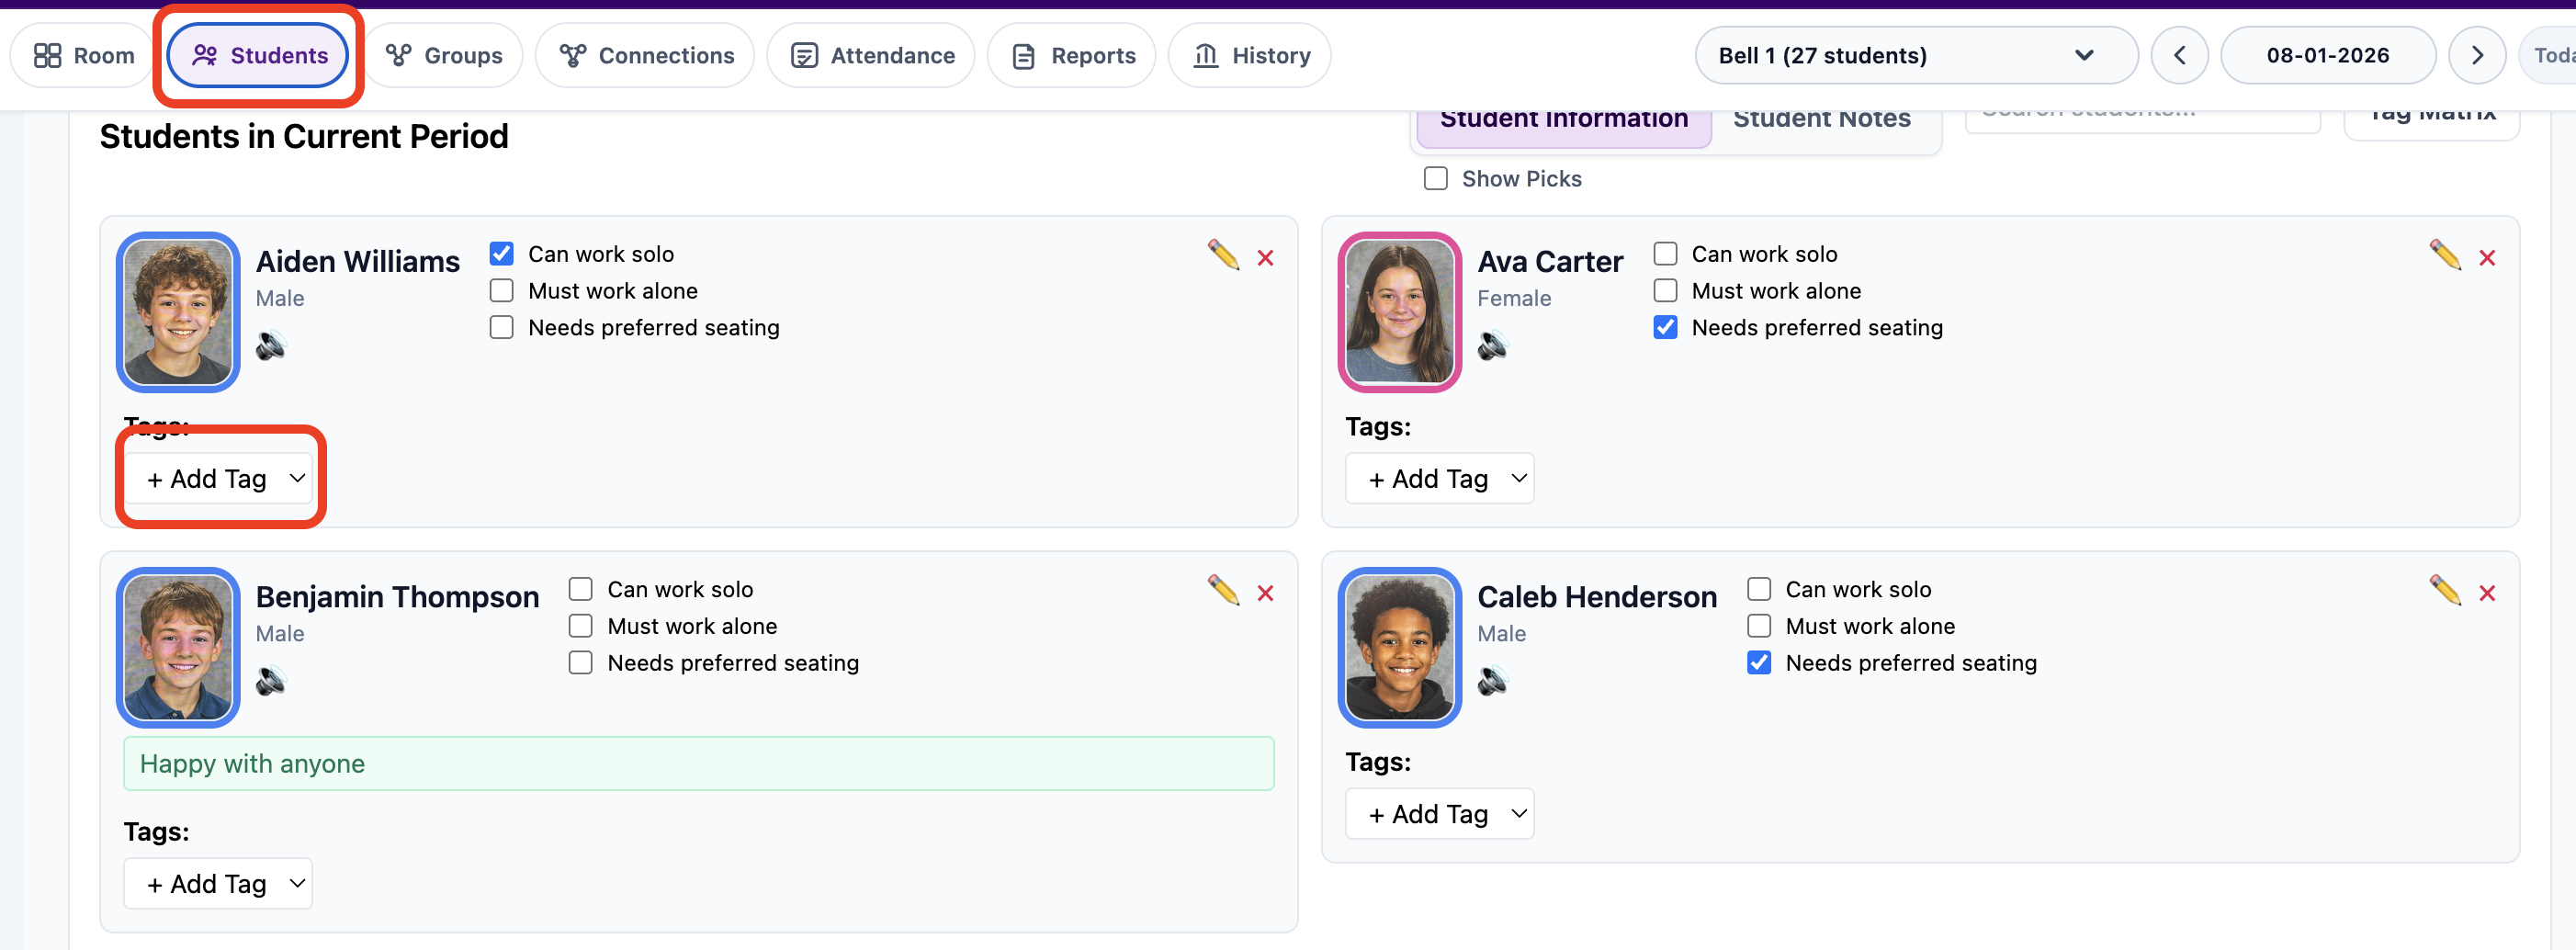
Select the tag you want to assign from the menu.
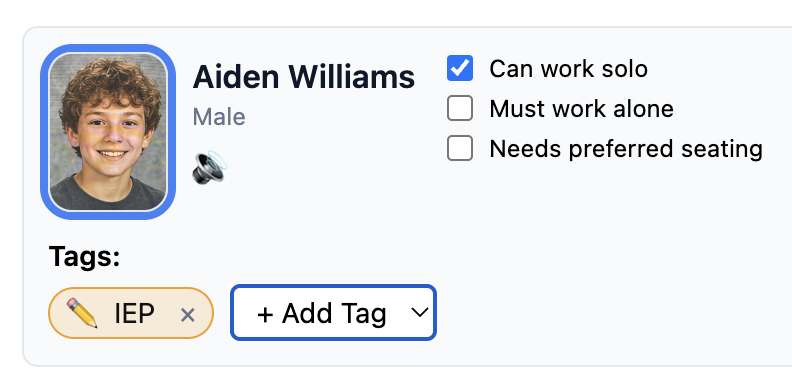
The tag appears on the student’s card. You can assign more tags the same way, or click the x on a tag to remove it from that student.
Video demo
Watch the full process of creating a student tag and assigning it to an individual student.
Next: Back to Student Tags